

I’ve been experimenting and practicing doing images transfers onto my pages recently. It’s been a lot of fun, even the failures that I’m frankly a little embarrassed to share… but you live and learn, right?

I thought it would be fun to add some pictures of my husband and I, since he is so often the blessing I am referring to.
- Originally I grabbed one of the extra photos I had lying around from our wedding announcements.
- I had already gessoed my page, and now I wanted to try and transfer the image from the photo to the paper. I brushed gel medium in a small square and then added the photo on top, going over and over it with my fingers to make sure I got out any bubbles and that it was as tight against the page as possible.
- I waited maybe a minute and then peeled back the photo- peel being the perfect word here, because the whole thing came off like a sticker. No part of the image had adhered to the page. I put the photo back down and went over and over it again with my hand, my fingers, and any tool I could find. I waited a little longer this time and tried again- nothing. My first attempt at transferring an image was a total bust. But, I had learned something- don’t use glossy photos if you want to transfer an image.
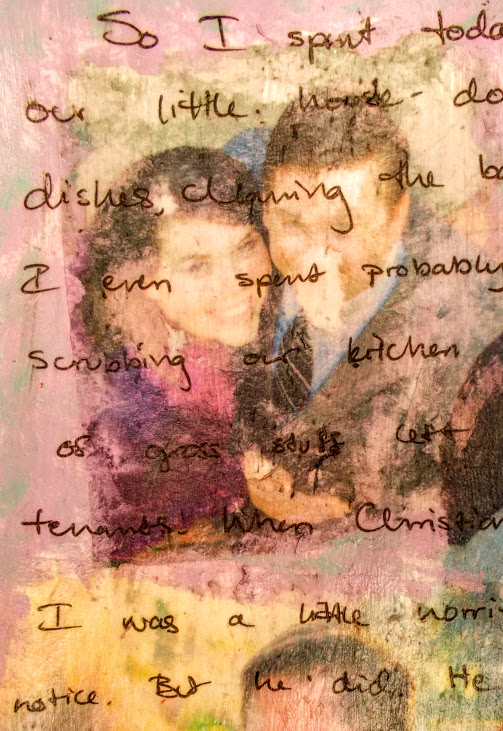
- So, I began again. This time, I printed the photos I wanted on plain paper, cut them to size, and did the same thing I had done with the photos, making sure I didn’t get any gel medium on the back of the paper.
- This time turned out much better, as you can see. I peeled the paper off bit by bit until I had to use a little water to rub off the excess with my fingers. The paper stuck more in some places than others, and I rubbed a little harder in some areas than others, hence some of the less colorful spots, but I loved the results, and I definitely have a better idea of what I’m doing when it comes to image transfer. :)

I tried again with my next pages, though I did things a little differently. First I crumpled the page, and then I watermark stamped all along it. You can’t really see it in this picture, unfortunately- I need a better camera. My birthday is coming up soon, though… :)
I used a few of Tim Holtz’ distress inks to add color, and I love how they mixed with each other and the wrinkles on the page. Then I worked again on transferring some images- this time, some sheet music.

Looks awesome! I can’t wait to try it!